


Ian Price1707820036
-
Posts
48 -
Joined
-
Last visited
Content Type
Profiles
Forums
Articles
Gallery
Posts posted by Ian Price1707820036
-
-
Thank you for posting this topic SIX TIMES rage
Ratch, every time I tried to upload the topic the web page crashed. And when I went in to check to see if it had worked on my profile it wasn't there. At the time I thought some site maintenance was going on.
-
It's great to see the return of the Airfix 1/72 Lockheed F-80C Shooting Star as this is a little gem of a kit and it's still worth the money. I have built this kit twice. Once when I was still at school many, many years ago and then a few years ago when I managed to get hold of a second-hand one online.
The kit has raised panel lines, the canopy was damaged due to its age and the decals were well pass their sell be date. But with a few aftermarket parts such as a new canopy, a bit of photo etch, a new decal sheet, a resin pilot and a bit of love and attention I managed to produce this.

The kit goes together well. The aftermarket parts are still available, the vac- formed canopy, the photo etch set and also the resin pilot. Well done Airfix for bringing back this little gem of a kit. And it's still well worth the money.
-
Lovely build.
Thanks mate.
-
Here are the finished photo's....
-
WoW thats a lovely build and I think the extra cockpit detail works really well.
I haven't grown up yet and discovered 1:48th scale kits but maybe 1 day soon.
But you have made an excellent job of the Gnat and I look forward to seeing more of your builds!
I think that Ian and I would agree that the Gnat is a good place to start, since it's about the same size as a WW2 single engine fighter, but having a bathtub cockpit and sparless wing makes an easier first build than, say, the wing spars and tube frame of the Airfix Hurricanes.
Yes I agree with that its an excellently engineered kit. Everything fits, the big clear canopy shows off the Eduard photo etch cockpit, infact its just a brilliant kit.
-
On to the decals, I used Micro Set & Sol to apply the decals and it was a straight forward operation without any problems. I left the decals over night to adhere to the varnish coat. I also painted the jet nozzle, strobe lights and antennas while I was waiting. The following day I gave it a more few more light coats of varnish to seal in the decals and finally a quick light spray of Self Levelling Thinner, to give an even shine.
Next I made up an oil wash for the panel lines and proceeded to apply it to the panel lines. Once dry I used a cotton bud with a tiny amount of oil paint thinner on it and I started removing the excess oil wash, dragging the cotton bud from front to rear over the panel lines. Once this was complete I sprayed the model again but this time with a flat matt varnish. This tones down the gloss finish and seals in the oil wash. When the flat varnish has dried I removed the masks from the Nav Lights, Canopy and Landing Light.
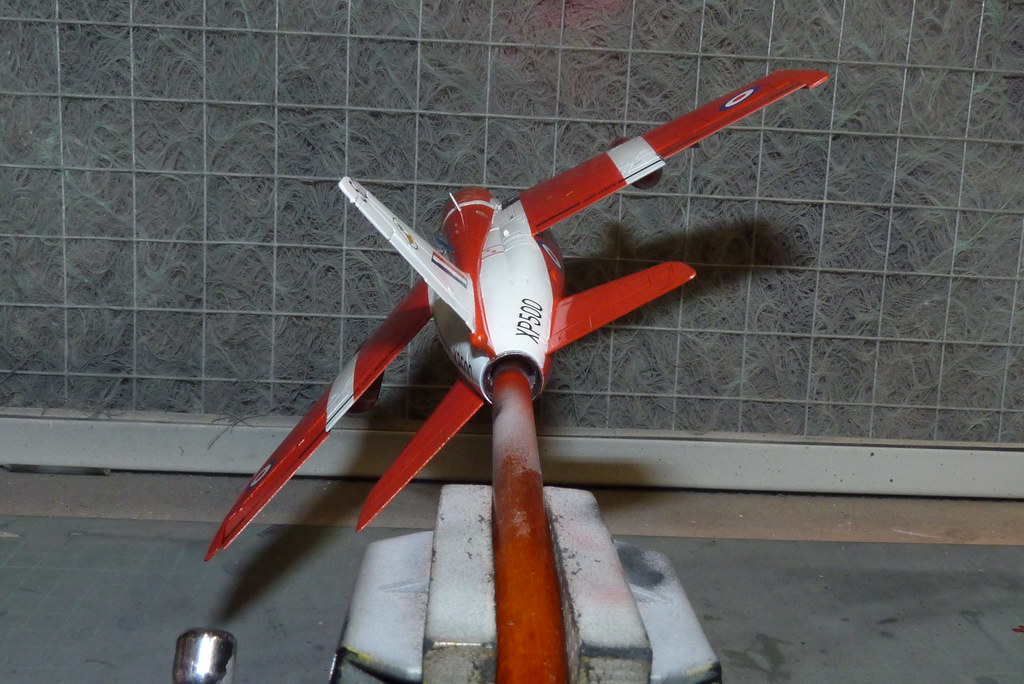
Now for the stand. The base itself is just a piece of oak flooring with the ends and sides routed and polished.
The 6mm acrylic rod was cut to size and bent using a small heat gun from the Hobbycraft store.
ll that was now needed was a 6mm hole drilled in the base and we are ready to rock!
And its done.
-
1. You could use epoxy but doing it this way means that the acrylic rod doesn't have to be a permanent fix which allows you to change the roll angle if you want and replace the acrylic rod if it ever snaps. Also I find that doing this way doesn't stress any of the plastic joints plus its cheaper.
2. I thought about not using the avionics bay then I decided to use it to help a line the fuselage halves.
I hope this helps?
-
I managed to sort out the over spray without any problems. Then I stabbed myself again with the pitot tube and proceeded to drop the Gnat on the floor. Lucky there wasn't any serious damage, just a few marks on the wing tips, tail and on the canopy mask. So out came the airbrush to do a bit of touching up. For the anti-glare on the nose and the treads on the air intakes I was going to use MRP NATO Black but when I sprayed it on the nose it looked more like slate grey. So I changed my mind and used Tamiya XF1 Black instead. Once dry I removed the masking tape and then I attached the drop tank using Tamiya Extra Thin glue.
I left it overnight for everything to dry. Next I added a few coats of Tamiya X22 Clear Gloss thinned with Levelling Thinner (50-50) to seal everything ready for adding the decals tomorrow. One thing I have found out while making this kit is the MRP Paint. Its easy to spray, smells, dries really fast and gives an excellent hard finish. I will definitely be using that again.
-
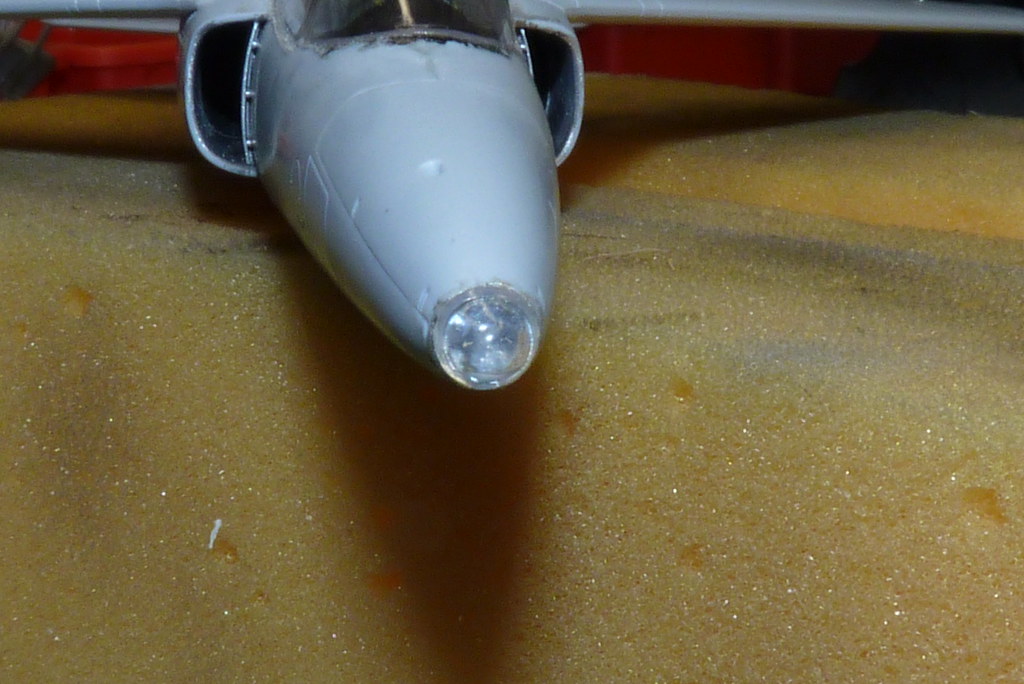
Thanks Paul. I attached the canopy with PVA and while that was curing I had a think about the nose landing light. I was going to paint the back of the light but It didn't give the effect I was after. So looking around my shed I came across a roll of cooking foil. So I cut off a small piece and glued it to the nose with PVA glue, smoothing out any creases with a cotton bud before the glue cured. When the glue had dried I then I cut off the excess foil using a new razor blade.
I then attached the light lens again with PVA.
As you can see from the photo the effect works really well and its cheap.
My next job to do was the pitot tube. I find the first thing to snap off a finished kit is the plastic kit pitot tube so if I can I will replace the kit part with a metal one.
So as normal I will have a look around my bench to see what bits are knocking around and I came across half of a syringe needle (the other half of the needle was used as a machine gun barrel on a 1/32 Revell Lee Tank I am also doing) and a pin.
The diameters were roughly the right sizes as the kit part. Using my Dremel I cut the needle to the required length, using the kit part as a template.
Then I cut the pin this time with a pair of pliers. The length doesn't have to be too accurate as the pin is going to sit inside of the needle.
Then using the kit part as a guide for the size I glued them together using CA glue. Once the glue had cured I attached the homemade metal pitot tube to the aircraft nose again using CA glue.
I also used CA glue to fill the small gap between the pitot tube and the nose.
Job done.
Another cheap idea. I use a car sponge to support my models during the builds. I normally have to cut bits out of the sponge to fit the kit but it works quite well.
Now for the nav lights. I tidied the lights up as best I could while still on the sprue so they didn't disappear and go walkabout in my shed as small parts do and I drilled a small hole in each to act as a bulb. Then I painted the light backs and the wing tip housing red and green.
I then cut the lights off the sprue but I didn't trim off the excess sprue off the light. I had a brainwave and I decided it would my them easier to handle with a bit of sprue still attached, which it did. I then proceeded to glue on the lights using PVA glue.
To make sure these were a good fix I carefully ran a small bead of Tamiya Extra Thin along the joint of each light.
The reason for this is when I am sanding the lights flush I didn't want them to fall off the wing tip, which would be just my luck. Now using a skinny stick I rubbed both lights down.
Then it was just a case of a bit of polishing.
Now I moved on to the canopy to do a touch of masking. First with tape.
And then with fluid.
Not forgetting the lights.
Now its ready for paint! Before I started to spray the primer, I masked inside the air intakes with thin masking tape and foam. As I still have a bottle of Badgers Stynylrez I used that for the primer coat. My bottle hasn't thickened up yet so on it went.
I added a touch of masking fluid to the front of the canopy just in case I missed a bit and the pitot tube looks a bit bent in the photo as I have stab myself a few times. With the blood cleaned off I straightened it without any further injury.
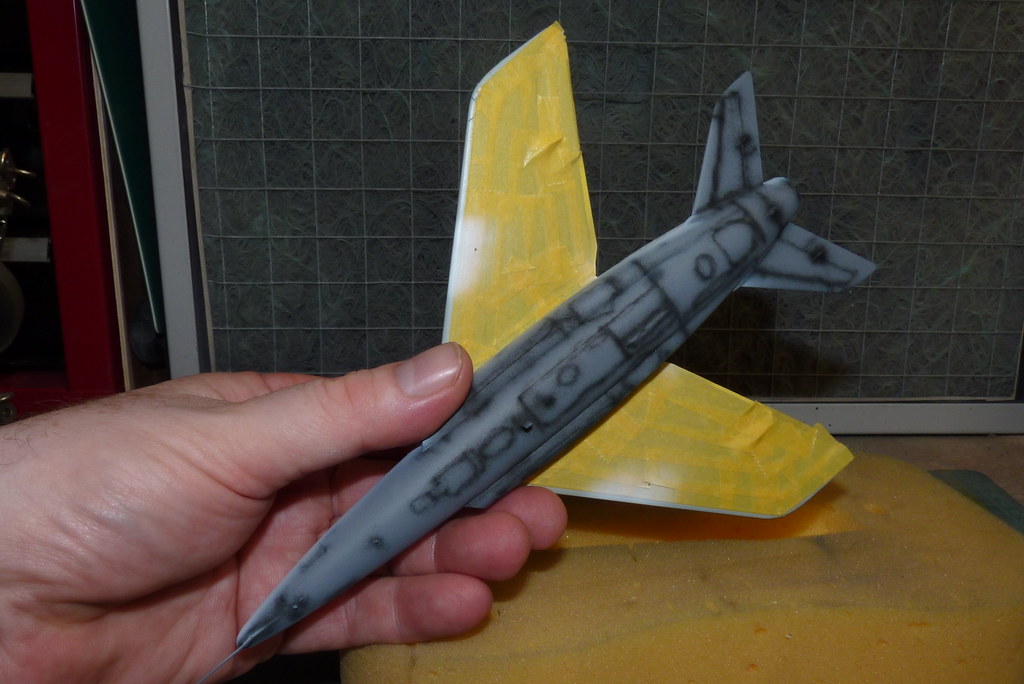
Now for a bit of pre-shading with thinned Tamiya XF1 black.
For the base coats I am going to use MRP paint for the first time and see how I get on with them.
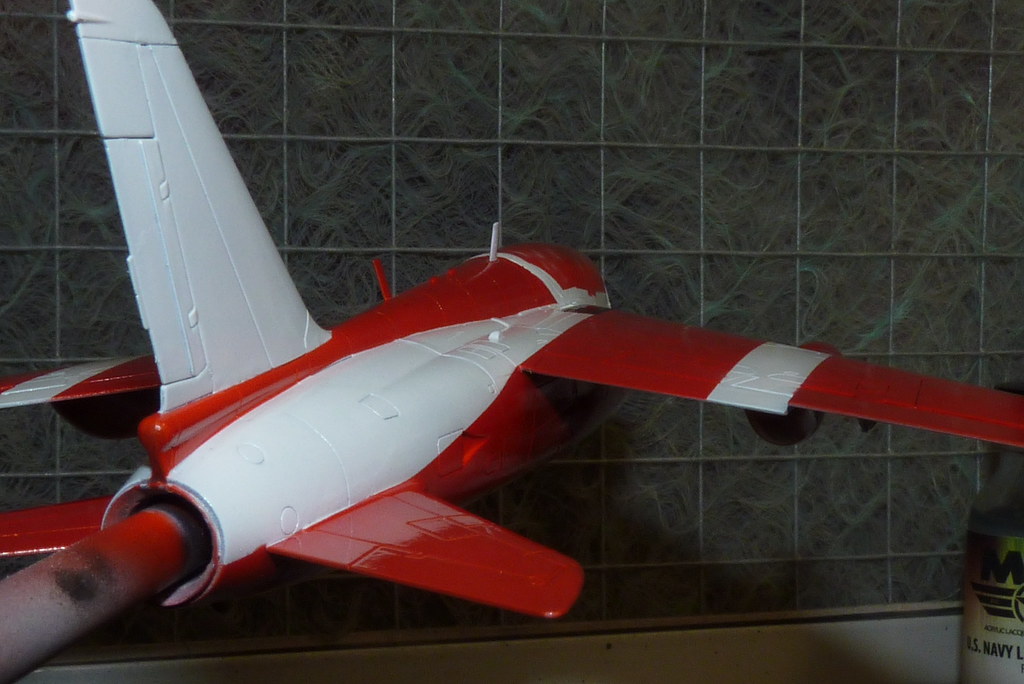
First I sprayed the underside of the wings with Light Gull Grey (MRP-98). The paint is lacquer based and is already thinned but stinks so an extractor is a must. But to say I was impressed would be an understatement. Its leaves a beautiful finish as its excellent to spray. Less than an hour later I had masked off the undersides and sprayed the white areas. Again the finish is excellent. A lot more than an hour later I masked again this time for the red. For the white strips on the wings, to line them up correctly; I had to temporary attach the drop tanks as a guide for the masking tape. Now for the red. The red I found was a bit thinner than the other paints so I had to give it loads of thinner coats but again it gave an excellent finish. Now for some unmasking. Being thin paint there was a bit of over spray but not as much as I thought and that shouldn't cause any major problems hopefully.
-
Very nice work, though I had some fit issues.
Mine were particularly around the cockpit and trying to put the canopy on. Don't know if it was me or the design of the kit, but I didn't think it was as good overall as their 1/48 Hawk.
Thanks David. I attached the canopy last night and there were a few small gaps. As for the Hawk, thats an excellent kit. I did one a few years back and I loved that kit that much I brought a few others.
Even the 1/72 is a good kit.
Anyway here we go again. When I was happy with the dry fit of the cockpit tub and the photo etch, I glued the cockpit tub to one of the fuselage halves along with the instrument part for the nose.
The fit with the photo etch was pretty good and it all went together well.
Once that had all cured I attached the other half of the fuselage.
Everything went together without any problems and the fit is spot on. Airfix have supplied a part for the front wheel well in the closed position which was easy to attach but it needed a touch of filler. Once done I gave all the joints a sand and polish.
The wing assembly was straight forward and you have a choice of parts for the position for the flaps. The ailerons can be moved and I have gone for one slightly up and the other slightly down because the aircraft is going to be banking to the right. When I was happy with their position and checking with the direction the pilot is looking I glued the ailerons in position.
Then I attached the wings to the main fuselage along with the elevators and tail fin.
There was a slight gap at one of the wing roots but this was easily filled.
Everything else posed no problems and I was really happy with the geometry of how they all looked.
I dry fitted the wing tanks to see if it looked right.
I had a small step where the wing attached to one of the air intakes but that again was easily sorted.
Next job to do was to paint the pilot with Citadel paints and washes.
With the pilot done in the cockpit he went. Looking at photo's I decided to add a few pieces of lead to act as the seat belt from the back of the seat to the main seat harness on the pilots shoulder. I already had fly fishing lead strip that just needed trimming to the right length and width.
Then they were glued in position using CA glue ready for painting.
Then they were painted. Just a cheap addition but I thinks it works.
Moving on, I painted bottom edge of the rear seat black before I glued in place to help prevent silvering that you sometimes get on clear parts and I glued that in position used watered down PVA.
Now for the canopy. As I have said before I had a small scratch on the canopy.
It wasn't too deep so I managed to sand and polish it out and I cleaned and dipped the canopy in Klear to finish off.
The canopy is really clear with hardly any distortion as you can see for the photo's so I dry fitted it to the fuselage just to check the fit.
As I have said earlier I have attached the canopy and I will post up some photo's on the next update.
-
My first look at the kit and I am impressed. Everything is nice, clean and sharp apart from the pilot which is a shame but then again at lease you get a pilot. The clear parts are nice and you get a choice of open or closed canopy. I will be using the closed canopy option as its an in-flight display and as sods law would have it there are a few small scratches on the one I will be using, but they should polish out. As for the decal sheet, the are also clean and sharp. The instructions are very easy to follow and well laid out.
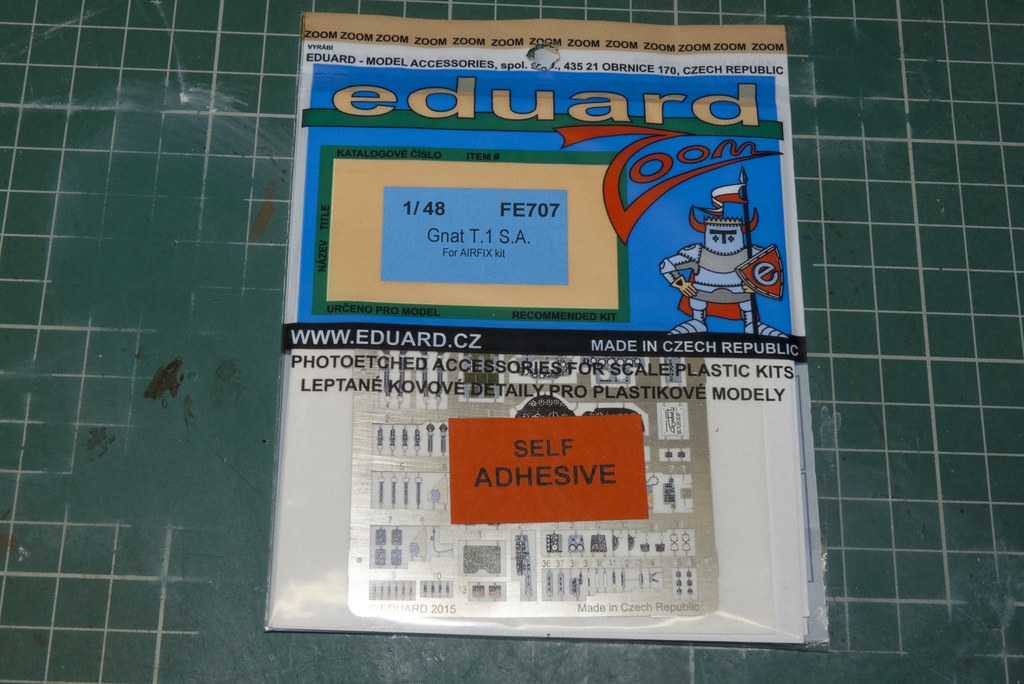
I am also going to use Eduard's photo etch set to add a bit more detail to the cockpit. I was going to use a resin pilot but I changed my mind and decided to use the kit one.I am a starting this later than I wanted due to the fact that I had to fix my shed roof to make it watertight and keep the rain off me. That hopefully done and on with the build. I am going to use bent acrylic rod to support the aircraft and have it in a banking climb. So first I measured the internal diameter of the jet pipe which was just over 6mm I think and then I had a look to see if I had roughly the right size rod which for once I did.
I attached the rear plate of the jet pipe and once the glue had cured I drilled out the 6mm hole first with a 3mm drill, then a 5mm and finally with a 6mm drill.
I did it this as I wanted a smooth regular hole for the rod.
y attention then shifted to the fuselage halves. There were a few injection marks on the cockpit sides so I filled them and I attached the air intakes and wheel wells.
Then on went the wheel well doors without any problems.
Now it was time for the cockpit tub, which again went together easily as per the instructions
While I was doing this I also removed a bit of the instrument detail ready for the photo etch. I did the same for the seats but I haven't glued the seats to the tub yet.
As for the pilot I cleaned him up as best I could and to add so life to him I chopped off his head. Strange I know but you have to be cruel to be kind as you will see.
With the surgery done I drilled a hole in his head and neck to take a copper pin.
I used copper as it lets you move the head to the right position without snapping.
When I was happy I glued the head in position.
As I have said before the aircraft is going to be banking so hopefully now the pilot will be looking in a more natural direction than he was. Thats the plan anyway. His arms were attached one at a time and left to cure before moving on to the next. This was done to ensure his hands are covering the right controls. Again hopefully.
Next job were the internal air intake pipes that were painted and glued together and inserted without any problems.
As for the fit, I would love to say it was due to my skill but no it is the kit. As you can see the fit is very good which so far is the story of the kit. Now for the turbofan which is an important part as you will see. I sprayed it and added a bit of an oil wash just incase it will be seen.
With that done I glued the jet pipe and turbofan to a fuselage half.
As you can see, the moulding at the back of the fan has a hole in it but not 6mm and due to the shape of the fan I couldn't drill in to it as I wanted it to support the end of the acrylic rod. Oh well never mind. To get around this I decided to use a pencil sharper to reduce the rod to the required size.
And it worked.
With that done I went back to the cockpit. I painted it and gave it an oil wash then I added a few bits of photo etch.
-
He is my go at this excellent old kit.


 The paint is lacquer based and is already thinned but stinks so an extractor is a must. But to say I was impressed would be an understatement. Its leaves a beautiful finish as its excellent to spray.
 Less than an hour later I had masked off the undersides and sprayed the white areas.


 Again the finish is excellent. A lot more than an hour later I masked again this time for the red. For the white strips on the wings, to line them up correctly; I had to temporary attach the drop tanks as a guide for the masking tape.


 Now for the red. The red I found was a bit thinner than the other paints so I had to give it loads of thinner coats but again it gave an excellent finish.
 Now for some unmasking. Being thin paint there was a bit of over spray but not as much as I thought and that shouldn't cause any major problems hopefully.


A Star Returns
in Aircraft
Posted
Thanks guys for the kind comments. As I said this is still a good kit. Also if you want to have a try at re-scribing panel lines this is a good kit to try it on.