
.JPG.5215291ed53d1e26da19aeaa0e4146ec.JPG)
.jpg.04fc09c5b33001c51cac4a28d65cadcb.jpg)
Ratch
-
Posts
7,952 -
Joined
-
Last visited
Content Type
Profiles
Forums
Articles
Gallery
Posts posted by Ratch
-
-
Airfix have issued the Mustang in RAF colours, so I'm not sure what your point is????
Issued as Small Starter Set (A55107) with decals for GA-S from 2012 to 2022. The P-51 was designed and built by North American Aviation to an RAF requirement, which was improved by the Rolls Royce replacement to the Allison engine.
 -
The B-17s I'm particularly interested in flew from Polebrook, Grafton Underwood, Chelveston, and Deenethorpe.
-
Good pictures Dominic. The new Airfix Liberator is the H, but the old one is the J, so these will be useful for that - (I have one of those to build).
-
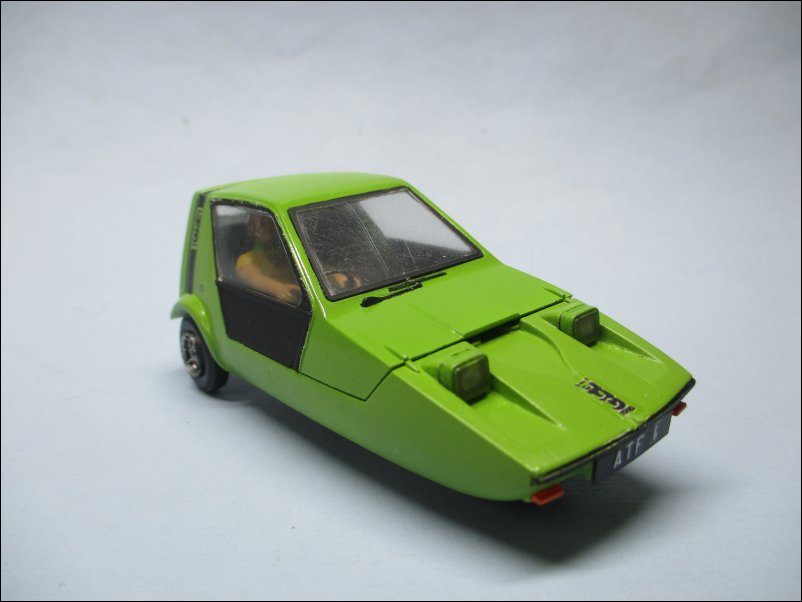
It would appear that in the case of the Bond Bug that only the mould for the transparencies was damaged beyond repair, because it was replaced to enable the Vintage Classic re-issue.
Jeremy Brook may know the condition of the other moulds.
-
Welcome to this latest edition of our Workbench blog and all the news, updates, and modelling exclusives from the fascinating world of Airfix.
As we continue on our development journey where we feature all the new tooling projects announced at the start of the year, we are delighted to be making yet another new kit introduction in this latest edition of Workbench, the fourth and final new tooling addition to our current Starter Set range of kits, the Eurofighter Typhoon FGR.4. Although Airfix have always been proud to bring the modeller as much subject choice as they possibly could, when it comes to supporting new and potentially first-time modellers in taking their first tentative steps into a hobby which has so far eluded them, there are clearly some subjects which carry more interest gravitas than most.
Perhaps even more than a current Supercar, or one of the famous Military Vehicles which contested the land battles of the Second World War, a model kit which features the RAF’s current air superiority fighter must surely stand the best chance of appealing to a new modelling audience than most other subjects. In addition to being the aircraft which most regularly appears on our TV screens and as features in newspapers and magazines, not to mention how it continues to hold Airshow audiences spellbound with its dynamic displays throughout the summer months, the Eurofighter Typhoon is box office in the world of aviation, something of an airborne superstar.
As just about the most thrilling machine any British youngster could ever hope to be in control of as a career aspiration, what better way to keep their minds focused on this aviation prize than building a beautiful scale representation of one and having it on display as constant reminder of their ultimate goal. These were just some of the many considerations facing Airfix designer Ethan Baker at the outset of this new Eurofighter Typhoon FGR.4 Starter Set project, the first time an Airfix designer had looked at the Typhoon as a subject since 1990. How could he represent all those complex shapes and cutting-edge design nuances into a lower part count, simple to construct scale model kit of an aircraft type so familiar to so many people. Perhaps of even greater importance, how could he ensure they enjoyed this first build experience enough to have them visiting their local model shop again in the future?
Thankfully, Ethan provides us with answers to these and other Typhoon related design questions, as he allows us into his specialist world once again in this latest edition of Workbench, also sharing a spectacular selection of CAD imagery to help aid our understanding – get ready folks, it’s Typhoon time!
Typhoon – The backbone of Britain’s air defence
Eurofighter Typhoon Airfix style, our latest scale tribute to this Fifth-Generation combat aircraft will be the final Starter Set addition to the current Airfix range.
Perhaps more than any other aircraft type in the history of aviation, the air defence/superiority fighter has captured the imagination of generations of people all over the world, inspiring some to become military pilots themselves and for the rest of us, driving our passion for aviation which has become an enjoyable and enduring source of fascination. From the Sopwith Camels which intercepted Zeppelin raiders during the Great War, to the Spitfires and Hurricanes of the ‘Few’ which fought so valiantly during Battle of Britain, these aircraft came to represent the very pinnacle of aviation design technology, not to mention the fact that these were also just about the fastest machines a man could operate back then.
These incredible aircraft were also the preserve of the most capable airmen in the country at that time, Britain’s most impressive people flying our most capable fighting aeroplanes in the defence of the nation, something only a fortunate and often privileged few could hope to aspire to. Under such circumstances, is it any wonder that both the men and their incredible machines have been so venerated over the years.
The aircraft which is currently charged with protecting Britain’s airspace from unwanted airborne incursion is the Eurofighter Typhoon, a highly capable aircraft which was born from an international design collaboration which aimed to produce an agile air defence fighter (European Combat Fighter Project) for service with several European air forces. Such a collaboration held the prospect of keeping costs to more manageable levels for those involved, as they were being shared across the partner nations, although each would ultimately have their own requirements, something which would put a strain on both costs and working relationships.
At the time this new aircraft entered the development phase, Britain’s sovereign airspace was being policed by such aircraft as the McDonnell Douglas F-4 Phantom and BAe Tornado F.3, the air defence variant of the RAF’s highly capable Tornado strike jet and whilst both were classic aircraft in their own right, neither could really describe themselves as being agile performers. With the USAF able to boast such manoeuvrable aircraft as the General Dynamics F-16 Falcon and world leading McDonnell Douglas F-15 Eagle, the new Eurofighter consortium was looking to develop their own agile fighter, one which was much better suited to the modern and constantly changing air combat arena.
Box artwork for the previous incarnation of an Airfix Starter Set Eurofighter Typhoon.
The multinational consortium was made up of the aviation industries of Britain, Germany, Italy and Spain and as the project progressed, it was clear that the new Eurofighter was going to be an extremely advanced aeroplane indeed. Designed to be aerodynamically unstable at all speeds, the aircraft was controlled by a powerful suite of computers, which combined to endow the fighter with exceptional agility.
Making extensive use of composite materials, the aircraft was to be powered by a pair of Eurojet EJ200 engines which propelled the fighter to a maximum speed of Mach 2.35 and the ability to supercruise without the use of afterburner. These engines were just as advanced as the aircraft itself and were designed in 15 fully interchangeable modules, with everything monitored in real-time to ensure the early indication of any potential problems with the unit. This was all designed to keep the aircraft serviceable and ready for action.
Equipped with an impressive array of targeting and defensive technologies, the Typhoon can also carry a seemingly endless selection of ever more capable weapons, as it has developed from its original air superiority fighter designation, into an exceptional multi-role platform, one which is truly at the forefront of military aviation technology. Now at the midpoint of its service life, the Typhoon is expected to remain in service until 2040 and beyond.
The Typhoon era began in earnest on 27th March 1994, when the first prototype aircraft made its maiden flight from the EADS facility at Manching in Bavaria, to be followed six days later by the first flight of Britain’s first development Typhoon (ZH588) from the Bae facility at Warton in Lancashire. The name ‘Typhoon’ was officially adopted for the new fighter in September 1998, the same year that the first production contracts were signed, committing nations to purchasing an aircraft they had already been working on for five years at that point.
The first operational RAF Typhoon Squadron was No.3 Squadron, which was established at Coningsby on 31st March 2006 and by the summer of 2007, the unit were sharing national QRA (Quick Reaction Alert) responsibilities with the RAF’s existing Tornado F.3 force, initially on a rolling month on - month off basis, but working up to taking this important duty over entirely.
Defender of Britain’s airspace, the Eurofighter Typhoon FGR.4 has become an exceptional multi-role combat aircraft and one which has already been in service for eighteen years.
The only thing that remained now was to introduce the Typhoon to the British public and allow this exciting new aircraft to take its place on the UK Airshow circuit as a regular display performer. Although the Typhoon had displayed at the huge RIAT show in 2004, this was a restricted performance from a development aircraft which only served to whet the appetite for what we could expect to see the aircraft doing in years to come. For a sizeable 50,000 crowd, that event proved to be the 2005 Cosford Airshow, an event which boasted a typically impressive line-up of historic and serving RAF aircraft, but for the first time, also a Eurofighter Typhoon, but still a development aircraft based at Warton on that occasion.
Under typically grey UK Airshow skies, history was about to be made at an RAF organised Airshow event and the sense of excitement was palpable. As the allotted display time approached, thousands of people were lining the entire length of a particularly deep crowd line, everyone desperate to secure the best vantage point from where to witness the aviation spectacle about to unfold before them. As everyone scoured the sky for their first glimpse of the RAF’s latest fighter, the crowd soon noticed a flashing nav light in the distance and seconds later, Eurofighter Typhoon T.1 ZJ807 blasted into the display circuit and into its first high energy manoeuvre.
Over the course of the next few dynamic minutes, this early Typhoon T.1 proceeded to do things that an 11-ton aeroplane really shouldn’t be able to do, cartwheeling across the sky at the whim of its pilot, keeping his display routine within the confines of a relatively small imaginary box above the airfield. With the display pilot making full use of the aircraft’s ultra-responsive afterburners, the dark skies only served to add to their impact, as they flicked on and off like a pair of powerful torches.
Ending the display with a spirited high-speed pass, followed by a pull up into the angry skies above, the Typhoon had introduced itself to an Airshow audience and what a performance it was. The age of the Typhoon had arrived, and this was now the aircraft everyone now wanted to see.
Now nineteen years on, the Typhoon is a mature combat aircraft, arguably one of the most capable aircraft in world service today and one which is now in service with the air forces of nine nations, with just under 700 aircraft ordered to date. Still the consummate Airshow performer, thousands of Airshowgoers will be looking forward to seeing this year’s Typhoon Display Team putting this exciting performer through its paces and inspiring the next generation of future RAF recruits.
An Airfix Typhoon FGR.4 kit for all
The new Typhoon starter set, complete with distinctive shadow stand, is surely destined to become one of the most popular kits of recent times.
As the aircraft which currently maintains the integrity of the UK’s airspace and the aircraft the RAF relies on when overseas events require a swift military intervention, the latest variant of Eurofighter Typhoon is certainly the highest profile RAF aircraft at this moment in time and is instantly recognisable to millions of people. It could also be claimed that it has become arguably the most important multi-role aircraft of the entire post war era, one which in conjunction with the F-35B Lightning II, represents a modern Royal Air Force both now and for its immediate future.
That being the case, surely if we wanted to introduce a model kit which had the best chance of appealing to people who may have never built a model kit before, or those who might describe themselves as novice modellers, that subject should be a Eurofighter Typhoon. With the F-35B Lightning II already established in the range, some might say the inclusion of a Typhoon Starter Set in the range is a little overdue, but fear not, Airfix product designer Ethan Barker has been on the case and we are proud to be taking this opportunity to introduce you to his latest Starter Set design masterpiece, our new 1/72nd scale Eurofighter Typhoon FGR.4 kit.
Anyone fortunate enough to have been allowed the opportunity to inspect a Typhoon at close quarters will be aware that this Fifth-Generation combat aircraft is all complex curves and unusual wing profiles, so the first question we wanted to put to Ethan was regarding the research information he received at project handover and if it included scan data from an actual Eurofighter?
Back in the Workbench designer interview hotseat once more, Ethan confirmed that he did have access to scan data from a full-size Typhoon to work with, along with a bewildering selection of detailed photographs and access to the copious amount of printed Typhoon information within the extensive Airfix reference book collection. He went on to say that for an aircraft which is described by its manufacturers as ‘The world’s most advanced swing-role combat aircraft’, some of the Typhoon’s design features and the technologies used are rightly closely guarded secrets.
Even so, the scan data obtained during a research visit to Germany provided all the complex shape information he was going to need in order to complete the design phase of this new project, and when this was combined with the other robust research information he had to hand, there really was nothing to deter his progress, just the thought of all those incredibly complex shapes he was going to have to contend with.
Scan data with skeleton model details overlayed over the top, an image which represents the early stages of Ethan’s Typhoon design work.
Overlay skeleton scan showing part splits and cutting planes.
A fascinating image showing the differences Ethan needed to be aware of when working with the scan data obtained from the German development Typhoon.
By way of a little project treat during the design phase, Ethan and our researcher Luke were afforded the opportunity to visit RAF Coningsby to see RAF Typhoons at their home base and significantly, were hosted by the Typhoon Display pilot for that season. Ethan told us that in addition to this day being a truly unforgettable experience for our dynamic Airfix duo (we added that bit), he was also able to obtain hundreds of detailed photographs (taken on an MoD supplied camera, all of which were checked before being presented back), which proved incredibly valuable, as he was able to concentrate on areas of the kit’s design which were proving particularly challenging for him at the time. Being able to see how the Typhoon’s designers overcame the problems really did help him to understand how best to replicate this detail in scale.
Knowing that this new Typhoon kit had the potential of being the Starter Set kit more new and inexperienced modellers would be coming into contact with than any other, he was absolutely determined to get this design project right in every respect, in terms of both subject detail accuracy and ease of assembly and from a design perspective, he certainly grasped the project gauntlet with both hands when taking on the new Eurofighter Typhoon.
Moving on to the design phase itself, we wanted to ask Ethan which aspects of the Typhoon project proved to be the most challenging for him?
As we usually find in these situations, it can often take a designer a few seconds before replying to this one, as they cast their minds back to the time spent on a project, we might be interested in finding out about now, but may have been a project completed many months ago for them. That being said, once they get in the groove, there’s no stopping them and they usually have many instances of design challenges to inform us about.
Ethan began his Typhoon related reply by telling us about the recessed missile positions under the fuselage of the aircraft and how these were a real challenge to get right in design, not only because of the complexity of their sculpted shape, but also because he had to ensure the shapes he created would allow the resultant model to be manufactured correctly when it came to that stage of the process, because after all, there was absolutely no point in designing something which looked great on his computer, if it wouldn’t then eject from the moulding machine.
Looking at one of the lower wing section design images Ethan sent us, it’s easy to see the complexity of the shapes present in the design of a Typhoon and how they must have posed him real problems when attempting to replicate these in scale. After all, he was designing a kit which had to be both accurate and easier to construct than a traditional kit.
Moving on from this, Ethan described how the wings also proved quite challenging to replicate in design and in several different ways. The Typhoon’s wings have rather a strange profile and when viewed from certain angles, you can clearly see how they appear to twist in various directions, but how it’s difficult to see where those twists start, or indeed end. Bound by a restricted part count on this design project, Ethan knew that the wings were going to have to form major components of his Typhoon kit and whilst they would all have to come together in a simple, intuitive manner, they would have to include lots of surfacing detail, in addition to including detail visible from other sections of the model. Everything would have to assemble logically, yet securely, with this relationship between parts possibly being the most demanding aspect of the entire project.
Ethan went on to describe how he was forced to make slight changes to his design throughout the process, as overcoming one issue often created another, but how he was confident in the knowledge that there is always a solution to be found. As with all Airfix design projects, adhering to strict part thickness tolerances whilst including all the detail required is a constant challenge and incredibly time consuming into the bargain. Even accepting that certain design compromises (Ethan calls this design trickery) have to be made to ensure moulding and manufacturing efficiency, there can be no compromise on the accuracy of subject detail – you just have to be clever in finding a way around the problem at hand.
An illustration of the location points on this sub-assembly fuselage half.
Draft analysis image Ethan used to assess the validity of his design.
The same image after Ethan has spent time improving his design from a tooling authenticity perspective.
The complexity of the front fuselage intake area – good luck with that Ethan!
As Ethan’s mind was now fully back in his Typhoon design world, the challenges he remembers facing just kept on coming. Next, he told us about the front air intake and how this was really difficult to replicate in scale. In this area of the design, it seemed as if every conceivable challenge facing an Airfix product designer all came together in the one area and how this probably provided more new design experience for him than any other project so far. The accurate representation of detail, thicknesses, appropriate manufacturing angles, assembly accuracy and the overall strength of the model kit all came into play around this relatively small area of the design and as a consequence, Ethan recalls spending an inordinate amount of time designing this section.
Going back to the early stages of the design phase, Ethan described how the work needed to construct his skeleton model proved to be much more time consuming than he had anticipated and from the perspective of designing surface detailing representation, this was the hardest project he had worked on to date. Everything was made more challenging by virtue of the fact that this was a Starter Set design and in the eyes of an Airfix designer, if the kit needs to be easier for modellers of all abilities to build, everything is made much more challenging for the designer as a consequence.
As we have learnt through speaking to different designers engaged in producing these kind of kits, a low part count and intuitive assembly order are key considerations when designing a Starter Set kit, because at the end of the day, if the kit looks great but it doesn’t come together in an easy, logical manner, the novice modeller might become frustrated and lose interest, something which must be avoided at all costs.
The creation of Ethan’s Typhoon skeleton model took much longer to achieve than he was initially anticipating.
Underside detail of the new Typhoon starter set, complete with its distinctive shadow stand.
Where a designer might be able to get himself out of a tight spot by introducing separate parts on a traditional kit design project, they have no such flexibility with a Starter Set, as they are always looking to incorporate the maximum levels of detail in the fewest number of parts possible on these projects. To illustrate this point, Ethan told us about the elevon actuators on the underside of the Typhoon’s wings and how these were originally intended to be separate parts on the kit. As the project progressed, he was able to incorporate these features into the design of each lower wing section, thus reducing the kit’s part count by four.
In fact, Ethan informed us that on this project, there turned out to be quite a few design changes which occurred as he progressed through this development phase and how finding different ways of overcoming both new and common problems is always rewarding for him. The opportunity for him to use his growing design experience and a little computer trial and error can often result in finding innovative solutions to these common problems.
From his time spent designing the new Typhoon Starter Set, we went on to ask Ethan which aspects of the new kit’s design are you are most pleased with and why?
Ethan told us that from a designer’s perspective, the most pleasing aspect of any project is always being associated with creating a beautifully accurate scale representation of the subject at hand, something every modeller will be proud to admire every time they look at it as part of their built model collection. As a Starter Set kit might be someone’s first foray into the hobby, this is even more crucial a desire when designing one of these kits, because as far as the intended audience for the model is concerned, they will only be thinking about the overall experience of assembling and painting their first kit and what the finished model looks like, not how clever the designer has been in overcoming the design challenges they have no perception of.
Talking about individual aspects of the design, Ethan described how the wheel bay detail he managed to incorporate into the Typhoon’s design was another pleasing feature, not only because of the amount of detail he was able to include, but also because this had to be achieved across three major components of the kit, all of which had to seamlessly come together to create the desired effect. He is really proud of how this detail looks on the finished kit but told us how it proved quite difficult to replicate in design – as they say, no detail gain without a little designer pain!
This next series of images all feature various design screenshots which illustrate how Ethan managed to incorporate all the impressive wheel bay detail into his design and how it is made up of detail across several different parts.
Hugely impressive, Ethan hopes modellers will enjoy the levels of detail he has managed to incorporate into his design.
Indeed, the replication of surface detailing across the entire model is something Ethan is extremely pleased with, as this all had to be designed on much larger components than on a traditional kit, all of which have to come together in an accurate, intuitive and robust manner, and once assembled, look as good as any Airfix model kit, even one which might have double the part count.
Other aspects of the new Typhoon Starter Set’s design Ethan is particularly pleased with are how he has managed to replicate the notoriously difficult wing twist a real Typhoon exhibits into his design, how his design also breaks away from the scan data he worked with which was taken from a development aircraft, to allow a scale representation of a current Royal Air Force variant of the Typhoon to be modelled and how the wheel bay detail already mentioned will hopefully become an enjoyable feature for anyone building his latest Starter Set design. A kit which goes together like a dream, Ethan hopes anyone building the new Typhoon will not only be impressed with all the detail it features but will also find the assembly process something of a breeze, no matter what their previous modelling experience might be.
In summary, Ethan reflected on his time with the Starter Set Typhoon project by describing how the start of the process was a little laborious at first, but how the end product was definitely worth all the effort. He described how the early stages of any new project can be hard work for the respective designer, because the process of creating their all-important skeleton model can often feel like you’re doing lots of rather repetitive work without seeing too much progress, just shape matching time and time again. Once they advance to the design phase proper, this is where your knowledge, experience and creativity can all be brought to bear, allowing a designer to really spread their wings and try new and innovative techniques in the hope they can enhance the overall appeal of their latest kit project.
He went on to describe how the new Typhoon proved to be quite a long and demanding project for him, taking around six months to complete, with between three and four of these months being exclusively the design phase alone. The kit is made up of 43 individual components, which compares favourably with the Lockheed Martin F-35B Lightning II Starter Set which is already in the range, a kit which comprises of 42 parts.
This next trio of images all show how Ethan managed to replicate the unusual wing design of the Typhoon, something which proved challenging, but hugely rewarding once achieved.
Both kits are slightly larger than the other aircraft models in the range, but as a model kit pairing, allow even the most inexperienced of modellers the opportunity to build their own scale tributes to the latest aircraft in current RAF inventory, scale representations of two of the most advanced combat aircraft in the world today.
This is a thoroughly modern kit design, a beautifully detailed scale representation of this increasingly important multi-role aircraft, just one which is much easier to build. Featuring the extremely popular shadow stand the aircraft kits in this range are now so renowned for including, your finished Typhoon kit can be displayed in all its dynamic glory once completed and will make for a fine tribute to the aircraft which currently polices Britain’s airspace.
Whether your aviation tastes are for the classic single engined fighter aircraft of the Second World War, or for more contemporary high-tech combat jets in current Royal Air Force service, the new Airfix Starter Set range has you covered and in some style. With ease of assembly and subject accuracy coming as standard, we will soon have no excuse for not embarking on a Typhoonfest of a modelling build project, using after market decals to produce scale examples of Typhoons wearing the squadron markings of all current RAF Typhoon units and thanks to Ethan, it won’t take us that long to do it!
As always, we would like to extend our grateful thanks to Ethan for kindly giving up his time to guide us through another one of his fascinating design projects and for sending us such an interesting selection of supporting imagery. We look forward to bringing readers our next Typhoon project update, where we will be looking at test frame components, box artwork and full kit scheme details – we may even have pictures of one of Ethan’s full test frame component builds to share with you at that point too.
With impressive detail throughout, Ethan hopes his new Typhoon Starter Set will become a popular addition to the Airfix range.
Designed for success, the new Typhoon Starter Set will hopefully encourage a great many first-time modellers to experience the simple pleasures of building a scale model kit.
The new Eurofighter Typhoon FGR.4 kit will be a spectacular addition to our Starter Set range of kits and we are hopeful that it’s destined to become one of our most popular models in the years to come, one which will hopefully introduce a great many people to the simple pleasures of building plastic model kits.We are afraid that's all we have for you in this latest edition, but we will be back next Friday with more project development updates and the very latest Airfix kit exclusives.
-
Before starting the build I airbrushed all the interior surfaces with Tamiya XF-71 Cockpit Green while still on the runners.
Details were picked out with a brush.
-
One thing I don’t like about this kit design is the excessive gates, which enter the mouldings on two edges.
This makes cleaning up arduous, and absolutely necessary to ensure the correct fit.
I appreciate that ideally the gate should be wide enough to ensure a free flow into the mould.
I do like the detail in these sub-assemblies. Almost little models in their own right.
I wonder what colours the bomb bay area and rear part of the fuselage are supposed to be. I suspect the bomb bay should be aluminium (bare metal), and the rear part Zinc Chromate Yellow, but I have painted them in the Vallejo colours converted on the Airfix table from the Humbrol paints specified on the instruction sheet.
I’m not that bothered as everything will be buttoned up and I doubt that any of the interior will be seen. I’m treating it as painting practice.
-
I decided to get a cheap, new, back-up to my Iwata.
-
M304C/03404-7Austin Maxi1/32 scale.Available as M304C from 1971 to 1972.Type 3D. Airfix logo without stripes with kit name under logo. 1963 to 1972.Issued as 03404-7 from 1973 to 1974.Mould believed to be irreparably damaged in France about 1980.And the other two mentioned kits:-03405-0Morris Marina TC1/32 scale.Available as 03405-0 from 1972 to 1974.Listed in 9th Edition (1972) catalogue as M305C but issued as 03405-0.Type 4D Box. Dual coloured round logo. 1972 to 1975.Mould believed to be irreparably damaged in France about 1980.M10C/01410-6/02413-8/A02413VBond Bug 700E1/32 scale.Tooling cost £9,832.Available as M10C from 1971 to 1972.Type 3D. Airfix logo without stripes with kit name under logo. 1963 to 1972.http://i422.photobucket.com/albums/pp303/BACAIRFIX/Airfix%201970s/1971CBONDBUGMFS.jpgListed as 01410-6 from 1973 to 1974, may not have been sold with this code.Issued as 02413-8 from 1975 to 1976.
Mould believed to be irreparably damaged in France about 1980.A new tool for the clear parts was made for the 2023 Vintage Classic re-issue of this kit.Announced for re-issue in Vintage Classic range as A02413V, availability Summer 2023, RRP £10.99.Available as A02413V in July 2023, limited run for 2023 only.Type 17C. Type 14 logo. Vintage Classics Box 2018 -
-
I fixed the drop tanks, the aerial mast, the propeller assembly, and the exhaust stubs. A protective coat of Klear was airbrushed over. Then I dabbed in the navigation lights under the wing.
The masking was removed from the transparencies and Gold-Zack Strick-Elastic knitting-in elastic made the aerial wire.
To conclude, this is a delightful kit to build, giving the novice modeller a good experience. Disregard my dodgy markings, the kit markings will be perfect to use, like the kit, much simplified from what the experienced modeller might demand. Yet the model itself appears to be quite sophisticated, and represents the Mustang well to my eye.
-
 2
2
-
-
I was not going to fit the bomb sight (B16) but considered that it may have been used on clandestine missions. F6 appears to be an ammunition feed for the nose turret.
I know that this turret was not used to save weight, so I made some alterations.
The instructions call for 25g to be added behind the instrument panel bulkhead. I don’t know what Paramjit used, but I could only squeeze 13g of lead weight into the space. I fear a tail-sitter on my hands.
I had two large ejector pin lugs on part #A7, a bulkhead, which needed tidying up. Step 14 addresses another compartment where 30g is supposed to be inserted. Once again, I could not get anywhere near that weight in, and cramming my aquarium weights into the void distorted the assembly.
This is obviously not a good thing. We have learned that any misfitting parts will have dire consequences later in the build.
-
I painted detail on the cockpit and dipped the transparencies in Klear. Decals were applied for the instruments. I have made up the ordnance, it will be going in to the bomb dump.
-
I masked for the anti-glare panel then sprayed Vallejo Model Air 71043 Olive Drab. I could then remove all the masking, except for the canopy, and touch up where required. I then hand brushed the stripes on the nose with Vallejo Model Color 70950 169 Black.
I then prepared for the decals by spraying Klear as a gloss foundation. The decals were laid down using Vallejo 73212 Decal Medium.
-
Academy did a B-17E too, I have one.
-
I made a list of the internal components to be airbrushed and selected Vallejo Model Air 71094 Green Zinc Chromate. It occurred to me that the interior may have been re-painted black to match the exterior, but I have no evidence for either colour. I brushed the propeller tips with Humbrol Acrylic Dropper Bottle DB0024 No. 24 Trainer Yellow – Matt.
-
Masking ensued before spraying with Ammo Mig One Shot White Primer and followed by further masking before spraying Vallejo Model Air 71001 White.
-
Some of you may know that quite recently I built the old 1/72 Matchbox Walrus. It will be interesting to see how the hobby has advanced over the 44 years between the issue of these kits. Of course, with the Airfix kit being 1/48 scale we can expect greater detail, but what about the basics? I will be building straight from the box, but using consumables I have to hand, and corrections to colours I deem necessary, rather than sticking with those specified. I intend to build option B, a Mk. I of 700 NAS, HMS Sheffield, 1941.
-
Initially I washed the runners in warm, soapy water. I then did some research into the aircraft. I had the H type on my Wanted List for one of those flown from Harrington in Northamptonshire during World War II.
From August 1943, specially modified Liberators were used on classified missions, codenamed ‘Carpetbaggers’. The missions involved sending commando units and spies (called Joes/Josephines) into occupied Europe prior to the invasion. No 801 (Provisional) Bomb Group was stationed at Harrington in Northamptonshire. 36, 406, 788, and 850 Squadrons formed the 801st carrying out these missions. Their B-24s were painted with a glossy black, anti-searchlight paint, with nose and waist guns and ball turret removed. A ‘Joe Hole’ was used in place of ball turret. Waist windows were blacked out and teardrop blisters added to both cockpit windows. Post-invasion they flew gasoline in to Patton’s tanks. My list of aircraft that flew from Harrington is as follows: 42-95036, 42-52767, 42-51124, 42-51187, 42-95317, 42-40474, 41-28871 ‘The Leading Lady’, I have photos of 42-52711 ‘Screwball’, and 42-51211 Y “Miss Fitts”. I am leaning towards 42-52711 ‘Screwball’, though I don’t have much photographic evidence of the appearance of any aircraft. Turning to examine the instructions, the opening steps involve assembly of the cockpit.
-
The canopy was fixed with G-S Hypo Cement and then masked ready for spraying and the airframe was primed with Vallejo Acrylic 70602 Gloss Black Polyurethane Surface Primer.
I then masked the nose and airbrushed AK Interactive AK479 Xtreme Metal Aluminium over the airframe.
-
1
-
-
40 minutes ago, Tour de Airfix said:
Interesting to see this moulded in green plastic.
Check the colour balance on your monitor - the plastic is grey!
-
I can explain one example because i attended the launch for the 1/48 Sea King. The subject was identified as a desirable one and the Airfix team worked closely with the helicopter museum at Chard in Somerset, along with the Royal Navy and Westland, plus ex-servicemen who had flown the type. Maybe this subject had more intense research than others, but not every subject will have information readily to hand. One error that jars with me was that the Boulton Paul Defiant model with markings of 151 Sqn at Wittering, 1943 was described as in Cambridgeshire!!! Wittering was in Northamptonshire until 1968 when county borders were changed! But I suspect that not a lot of people know (or care) about that.
Sometimes I use the kit markings, but mostly I model subjects of particular interest to me and have to buy aftermarket decals or make up from generic sheets.
-
1
-
-
This build will be a little different from my usual review builds, which are normally straight from the box, only using what comes in the kit (in the case of Gift Sets), and except for consumables on the larger kits. Some of you may know of my interest in the 20th Fighter Group who were based at Kingscliffe in Northamptonshire. I like to model aircraft associated with this Group and the decals provided with this kit give me an opportunity to finish this aircraft as 472519 LC-D Gumpy, an aircraft of the 77th Fighter Squadron. I prepare for the build by washing the runners in soapy water and allowing them to air dry. While waiting I can research the aircraft. My reference library includes 20th Fighter Group by Ron MacKay ISBN 0-89747-368-X and I can check for any corrections that may be required. I have Carpena squadron code letters and Ventura serial numbers, and I will attempt to freehand the nose art.I examined the instructions and planned my build sequence. Initially, I painted the pilot figure and cockpit prior to assembly.
I also painted the propeller tips and then the blades and spinner. Details in the cockpit were picked out with a brush.
Before assembly, gates must be properly cleaned up or it will result in misfitting parts. Simple nail files do an adequate job, though the more experienced might perform the task quickly with a sharp knife. One anomaly I must point out on the instructions is the glue indication when fitting the cockpit into the starboard fuselage. The places to run the glue are indicated in yellow – a very good idea – but the indication is that glue should be applied on the upper side of the whole guide moulding. In fact, the rear portion of the innards goes under the guide moulding, so the yellow indicator should be underneath.One of the simplifications in the design of this kit is that the inner undercarriage doors are part of the lower wing moulding.
Some modellers like to have these open on grounded aircraft. In fact, the doors were held shut by the pneumatic system and would only drop to the open position if that bled off. As I am modelling the aircraft in flight, this feature is useful.
The tail wheel gives a problem though. The doors for the tail wheel are moulded open whereas the in-flight mode would be with the wheel retracted and doors closed. To portray this, I cut the doors off and replace them with some scrap plastic card. No filler was needed throughout the build.
-
They were Max kits 😉
-
 1
1
-
-
The best advice I was given was to use colours I am happy with.
.JPG)


Hawker Typhoon Mk.1B
in Aircraft
Posted
Jon, there's a whole thread on Invasion Stripes here;